Fast motion vs slow motion. What you need to know!

It was once said that everything looks better in slow motion. I don’t exactly disagree. Everything does seem to look awesome and better in slow motion. The ability to slow down time and highlight an exciting moment is a must in anyone’s filming toolbox. However what about fast motion video? Or High Frame rate video as it’s sometimes referred to? High frame rate video can also highlight an exciting moment in real time by making the video as crisp and clear as possible so you see every single action moment in perfect clarity. The thing is though, slow motion video and high frame rate video are the exact same thing….. Confused yet? Well don’t worry, because in this article, we’re going to look at the differences between slow motion and high frame rate video.

Now before we get into the nitty gritty, I’d also like to announce that since my YouTube channel is coming up to the milestone of nearly 2K subscribers, there’s going to be a giveaway to celebrate! This will be some exclusive DemonView swag and what could possibly be the greatest piece of technology in the world…. possibly, I don’t know, I’m still reviewing this hardware, but the lucky winner will be getting their hands on the review model. So be on look out for that when the channel hits 2K subscribers, this will be a fun cool giveaway and I’ll be announcing the details of the giveaway when we hit 2K! (if you don’t want to wait, go to my YouTube channel, hit like and subscribe now to get us to that mark sooner!).

I assure you, the prize is not an empty box!

Ok, on with the article. You’ve probably all heard of slow motion video. You know the types of shots, where things slow right down to ½, ¼, 1/8 normal speed and really highlights an epic moment or fun scene in a video. It can look stunning and honestly, it can be a lot of fun to film slow motion video. So how is it accomplished. Well this one is fairly simple and involves some very simple math.

When you’re watching what I’d refer to as a “normal speed” video. You’re watching a video that’s recorded at 30 Frames per second and then played back at 30 frames per second. This means that for every second of video recorded, there are 30 individual pictures that make up that frame.

When it comes to slow motion video though, you actually film at a much higher frame rate such as 60 frames per second. However you would then edit the video so that it plays back at 30 frames per second. This will result in you having ½ speed slow motion.

If you recorded at 90 frames per second and play back at 30fps, this gives you 1/3 speed slow motion.

Recording at 120FPS and playing back at 30 FPS, this gives you ¼ speed slow motion.

And finally, recording at 240FPS and playing back at 30FPS gives you 1/8 speed slow motion.

Now the reason we film in a higher frame rate for a slow motion shot is that if you filmed at the normal 30 frames per second and then tried to slow the footage down to ¼ speed, you would then end up with 7.5 frames per second. This would look unnatural, more like a slow paced slide show rather than smooth video. You really want that playback video to be a minimum of 24 or 30 frames per second upon playback so the video looks smooth and natural.

And THAT is the very simple math explained.

The math is much more simple than this!

So why not shoot at 240FPS all the time and then just slow down the parts you want? Well there are a couple of reasons for this.

1: You’re creating some really large files when you shoot in a higher frame rate. I mean if you record at 30 frames per second, you have a normal file size. If you record at 240frames per second, then you’re essentially creating a files size 8x larger. So you could end up running yourself out of SD card space due to the amount of information you’re capturing.

2: It’s a lot more strain on the camera to shoot at such a high frame rate, so this is going to require more battery power and drain your battery faster.

3: Since your camera is working harder, it’s going to heat up a lot faster too and no one wants their camera to overheat.

4: The higher the frame rate you use, the less time there is for light to hit the sensor of your camera, so higher frame rates require even more lighting. To low a light and too high a frame rate, and you’ll end up with a lot of ISO noise in your footage.

So when it comes to shooting slow motion video, it’s always best to do it in short bursts. This not only combats all the above listed points, but it also speeds up your editing process as now you don’t have gigs worth of data to sort though just to find the shot you want.

Now that’s the basic explanation of slow motion. So what about High Frame rate video? Well high frame rate video is something that you may have seen in a lot of TV shows or movies, but didn’t know what it was called. For instance in scenes of fast action, where you really want clear details shown during an action scene to ramp up the feeling of speed, you’d film in a higher frame rate to eliminate motion blur.

So if I film a water hose spraying water at 30FPS, you’re going to see the water spraying and that’s fine. However, if I film the same scene in a high frame rate, not only do you see the water spraying, you also see the individual water droplets in the spray. This is because at a much higher frame rate, you’re eliminating motion blur, and now, every single detail looks crystal clear.

So when you watch an action movie and see two people fighting, or see some bullet strikes hitting the ground, this is usually filmed in a much higher frame rate than 30FPS.

Now I know what you’re thinking, this sounds the exact same as slow motion, you’re shooting at a high frame rate! Well, you’re right, it’s the exact same thing! The difference is that you’re recording in a high frame rate, but you’re also going to play back at the same frame rate the video was recorded in.

So if you record at 60 Frame per second, you’re going to play back the file at 60 frames per second.

If you recorded at 120 frames pers seconds, you’re going to play back the file at 120 frames per second.

This means that you don’t get a slow motion effect since you’re playing back the file at the exact same speed it was recorded at. So your speed stays at “normal” speed. You’re just getting a much sharper, clearer image.

And that’s it! That’s the simple difference between slow motion video and high frame rate video. How they are essentially the same thing while being filmed, but the difference is how it’s played back (or rendered if you’re doing an edit).

So when should you use slow motion vs high frame rate video?

Well that’s honestly an artistic choice for you, the creator. Slow motion is good for highlighting a very specific piece of action. Like the scoring of a goal, creating a fire effect, something that only happens for an instant, but you then want to make that instant last a lot longer on film.

With High Frame rate, think of a much longer action set piece, a fight scene, a motocross bike race. Something where there is a lot of consistent action going on and is very high motion and you don’t want blurring and most important, where you don’t want to break the pace by having something in slow motion.

A good example would be a boxing match for instance. You’re film in a high frame rate to highlight the speed at which each opponent throws a punch. Using high Frame rate is excellent for this. However if you were to shoot this in slow motion, you wouldn’t end up with an exciting fast fight. You’d end up with everything being slow……. and boring… and dragging on for ages. However, you could combine the two….

Slow motion, professional stunt actors and lighting also helps make a scene look cinematic…. but ya know, mainly slow motion…..

So film the fight in a high frame rate video, but when someone lands that knock out punch, then you can slow down that one single punch to slow motion. And remember, you can do this since filming in high frame rate and slow motion are the exact same thing! It’s just that one single punch scene that you’re going to slow down to play back at 30 frames per second…

However, remember that filming in high frame rates are going to put a lot of strain on your camera, drain your battery and fill up your SD card. So it’s good to plan things out in advance, know when to use high frame rates and when not to. Do that and you’ll soon be a master cinematographer when it comes to using higher frame rates.

And there you go! The difference between high frame rate and slow motion video, why they are both the same thing and yet completely different! Hopefully you found this article helpful and you’re now on the road to being a master cinematographer.

So thanks again for watching, come back soon and check for the announcement of DemonView’s upcoming giveaway! You never know, you could be the winner (and lets face it, the odds are WAAAAY better than winning the lotto!).

Until next time

Cheerio!

GoPro Cinematic Footage, what accessories should I be using?

There’s been plenty of advice given on cinematic shooting with your GoPro camera. People telling you the best settings to use, shoot in flat mode so it’s easier to color grade in post, make sure that your shutter speed is double your frame rate and to shoot at 24FPS.

While this is a good starting point, there are some valuable points missing from this advice. For instance, manually settings your shutter speed to double your frame rate will indeed give you the proper amount of motion blur in a shot… but if you’re shooting on a sunny bright day, this can actually overexpose your footage and you end up with unusable shots. I mean, has this ever happened to you? So, in this post we’re going to look at a different aspect of cinematic shooting. We’re going to look at some of the accessories that you should be using when it comes to shooting with your GoPro camera.

There are many different videos and articles out there telling you what settings to adjust on your camera and promising “Cinematic” footage as a result. However, you’ll very quickly find out that if you use those settings, your footage is anything but cinematic looking. For instance, maybe you’ve been told to manually set your shutter speed to double your frame rate for a natural looking motion blur, however as soon as you do that, you suddenly find yourself with over exposed washed-out footage.

24FPS 1/48 Shutter speed resulted in an overblown image.

Sure, you could increase your frame rate and shoot at 60FPS or 120FPS and this will darken your image… but isn’t cinematic footage shot at 24FPS? So, what am I supposed to do?

Well, this is where ND filters come in. ND filters are basically sunglasses for your camera. It’s that simple. So if you’re shooting on a sunny day and you’ve manually set your shutter speed to 1/48 and your frame rate to 24FPS, your image stands a very good chance of being blown out. In which case, you put an ND filter on your camera to reduce the amount of light hitting that sensor. This balances your image and now you have the proper light balance for your shot.

A correctly exposed shot using 24FPS 1/48 shutter speed and ND Filters.

While there are various ND filters on the market out there, I recommend using the Polar Pro filters. They are specifically designed for the GoPro camera, they are manufactured using high quality glass and their quality is second to none. Cheaper options could be using cheaper materials and the last thing you want is some bargain basement filters ruining your shot. You want a premium glass filter, not a plastic filter that’s going to add distortion, easily scratch and just make your image look like a much lower quality picture.

The very best ND filters for your camera.

Then there’s night shooting. While the GoPro can produce some great night shots, it’s not really a night camera. It’s got a small sensor and it really is suited to bright action-oriented shots. However, this doesn’t mean you can’t use it at night, it just means that you have to set it up in specific ways. For one, I never use Hyper-smooth at night or in low light conditions. It just doesn’t work in low light conditions as the low light means your camera is using a lower shutter speed which ads blur. Now your GoPro is trying to stabilize a blurry image and the results look less than ideal. Instead, you’ll want to disable hyper-smooth and use a Gimbal instead. Most gimbals also allow you to control your camera directly from the gimbal itself so you don’t have to touch the camera at all.

The Inkee Falcon Plus gives you great options as a Gimbal.

The Inkee Falcon Plus is actually quite a good gimbal to use as you can actually fit this on the camera even when the camera is using it’s media mod. So if you’re going to shoot in low light conditions or at night, you really do need to invest in a good quality gimbal.

Another good option to have on for low light shooting is external lights. Look at any “Hollywood” production when they shoot at night. You’ll notice that they have lots of lighting units. Even in supposedly dark shots, there are not only lights out of frame, but lights hidden in the shot also. So, for low light shooting, you’re going to want to use additional light sources. Although these won’t have much effect in distance or landscape shots, when will make a lot of difference on close up shots or vlogging shots. There are many different options out there and some of the options are complete studio lighting kits which can be very helpful. This is the kit I personally use below and it’s a good all in one kit. Not only does this give me complete studio lighting, it also has a white, black or green screen backdrop as well as collapsible light reflectors for outdoor shots.

A complete yet cheap solution for creating your home production studio!

However, if you are out and about and want something more mobile and suited to handheld video, you want to avoid harsh lights and shadows when shooting. So therefore it’s best to get a large flat panel with a light diffuser on it. Even better, make it a panel with adjustable RGB colors. This can add an extra level of cinematic quality into your nighttime shooting.

The Lume Cube panel pro offers you complete app control over your portable lighting.

Finally cinematic sound. This one is a bit complex as there are many factors at play here. It all depends on if you want vocals in your footage or to have more ambient sounds in your footage instead. So the type of sounds you want to record will determine what type of microphones you should be investing in. For vocals, I’d recommend using something like the Rode Wireless Go 2. This is going to give you a whole lot of options regarding your sound recording, whether or not you want separate audio channels for 2 vocal tracks, a combined audio channel or even an independent backup of the audio recording. Rode also offer PC software for managing your microphone settings and recordings, they also have software to download if you want to use the same mics for doing your own podcast. So this is something you really should invest in.

A quality wireless audio setup for interview or field work.

For a more ambient audio scenario, I’d recommend using a shotgun or boom mic on a shock mount attached to the camera. This is going to give you a more cinematic quality by allowing you to record sounds coming from where you have the camera pointed. This is really about the ambient sound coming from a specific direction and can work out quite well. The only downside is that if you are trying to talk during your production and the mic is facing away from you, then it’s not going to record your voice very well. So again, for vocals, use a good wireless mic that you can attach to your shirt, but for ambiance or audio coming from in front of the camera, use a shotgun or boom mic.

Small but powerful professional audio…

However, what you should be doing in addition to these audio techniques is recording a baseline audio track to capture the ambiance independently. This way you can edit the audio later in post-production and boost or lower background noises depending on what’s happening in a scene. So having a separate external audio recorder is also a good idea. This may simply mean going to your shooting area ahead of time, recording 5 minute of audio and then looping that audio into your finished recording as a background audio source. The advantage to doing this is that if gives you the most control over your audio in post-production. So, if you’re vlogging and recording a vocal track by a waterfall or by an ocean, you can lower or raise the background that audio so that it doesn’t drown out vocals you’re recording. Whereas if you’re trying to record everything at once using in camera audio, you just don’t have that level of control over the audio levels and if your background starts drowning out your vocal track, there’s not going to be much you can do about that in post-production while trying to retain a listenable quality. So, this is where a good quality digital audio recorder is really going to help you out.

Get Professional Audio using this!

So those are my recommendations for recording cinematic video using specific accessories. These should help you level up your cinematic shooting game and help you get on the path to awesome footage.

So if you liked this post and want to find out more GoPro tips and tricks, then go visit my YouTube channel @DemonViewLLC. There’s lots of helpful video’s on my channel including tips, tricks, reviews and cinematic movies. Make sure you click those like and subscribe buttons as they really do help out with channel views and ensure the continuation of quality content for you.

Until next time, Cheerio!

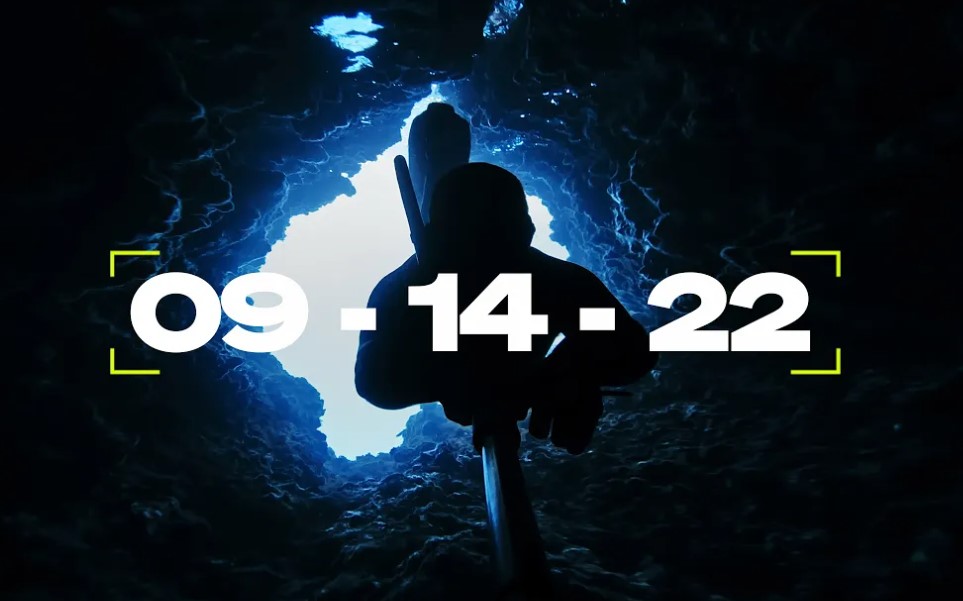
GoPro Hero 11 & 11 Mini hints & leaks

GoPro is dropping some serious hints about the capabilities of the new GoPro model lineup. Did you spot the hints that they dropped? If not, then let’s take a look at some of these hints and leaks.

So, GoPro have finally made an announcement regarding their next line of cameras. That announcement being of course a teaser for the GoPro Hero 11 and the GoPro Hero 11 Mini. Yes, that’s right, not one, but TWO brand new cameras from GoPro.

9/14/22 is the big date and you should tune into the GoPro YouTube channel for the official announcement. However, since waiting isn’t something a lot of people are great at, it looks like GoPro have given two hints about their next model. Did you spot them?

For those who don’t know, GoPro have done something that no one expected, not even me. Their GoPro Hero 11 is NOT a redesigned camera. In fact, it pretty much looks to be the exact same size and shape as the Hero 10. Not only that, but there also isn’t any increase in frame rates or video resolution either. Specs indicate that it still has a max resolution of 5.3K at 60FPS. So why on earth would people want to pay money for this new camera if it’s not bringing new things to the table?

Well….. it actually may be bringing something really special to the table, after all, it’s what’s inside that counts. One thing that has changed however, is that there is an upgrade in photo resolution. The Hero 10 took 24mp photos and the Hero 11 is rumored to take 27MP photos. This means the camera very likely has an upgraded sensor.

So, what about those hints that GoPro have given? Well, let’s take a look at two things, first up, the leaked pictures of the Hero 11 from Winfuture.de

You can find those shots here

GoPro Hero11 Black: Action Cam Gets New 27 Megapixel Sensor – WinFuture.de

So one thing that’s pretty prominent is that gallery is the photo on the rear and front screen. It’s an underwater shot showing what looks to be stingray fish. Lots of them in fact. It’s a nice blue shot and possibly taken at depth.

The next thing we are looking at is from the GoPro Teaser found on their YouTube channel

GoPro’s announcement teaser image

As you can see, it’s a picture of a diver in full scuba gear diving into an underwater cave AND it’s pretty darn dark.

So those are your two hints, now what do they mean?

Well, I personally think that this can point to a few things with the Hero 11. It could mean that like some other cameras, it now has a specific “underwater” mode that automatically applies processing to underwater footage without the need to have to buy specific filters.

What it very likely means though is that the new GoPro sensor also is upgrade in terms of low light conditions. This has always been a sore spot for action cameras due to their sensors small size. When used in low light conditions the picture is less than optimal resulting in grain, noise and especially blurring when used with Hypersmooth. In fact, Hypersmooth pretty much does not work in low light conditions.

So, the introduction of a new low light capable sensor and the fact that the GoPro Hero 11 is touted to have Hypersmooth 5.0, this is a sure indicator that the GoPro Hero 11 is going to offer superior low light performance.

Since the GoPro Hero 11 and GoPro Hero 11 mini are also rumored to be using the exact same sensor and processor, expect both models to offer the same performance.

In the meantime, we have to wait until the 14th to see what GoPro are going to reveal to the public, but until then, we just hope GoPro drop us a few new hints to get us all excited for this next camera release.