
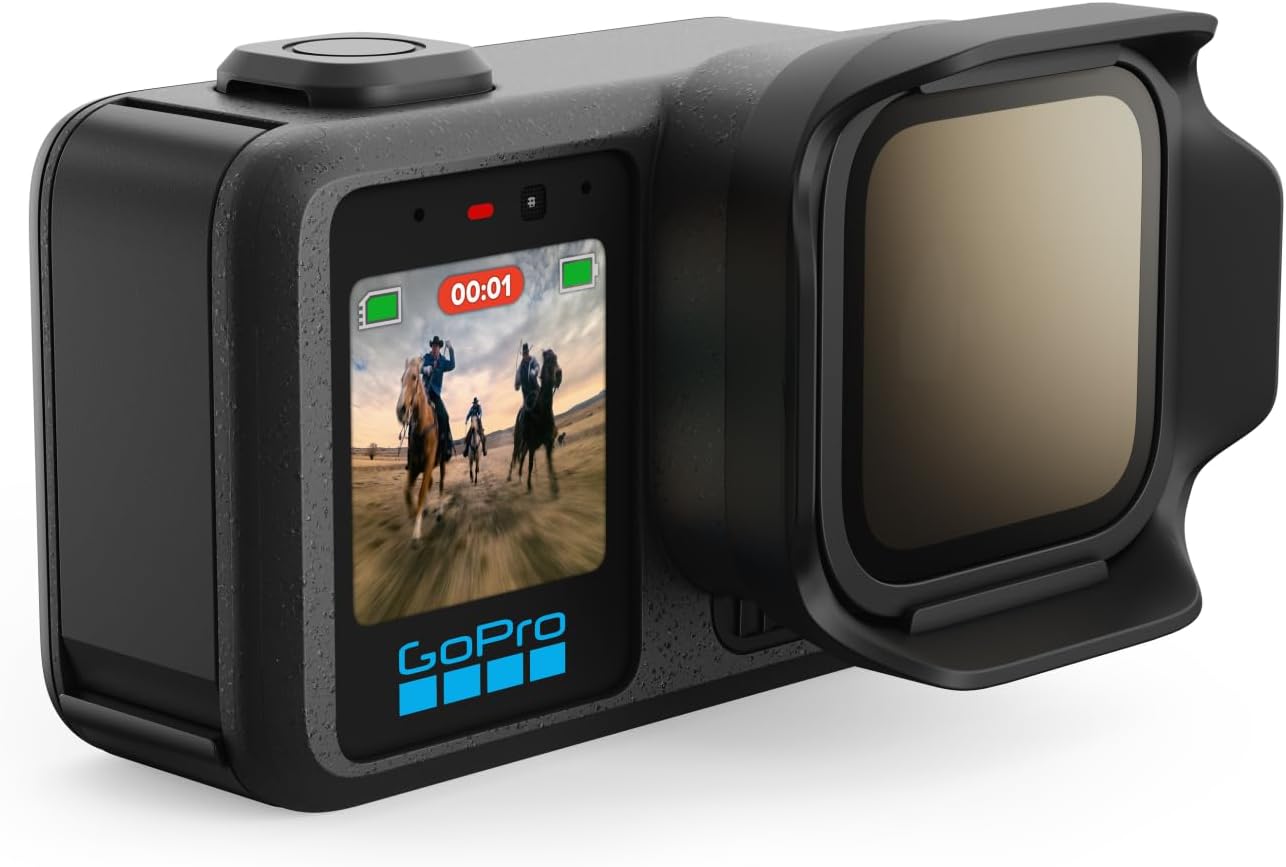
So you’ve bought yourself a camera.
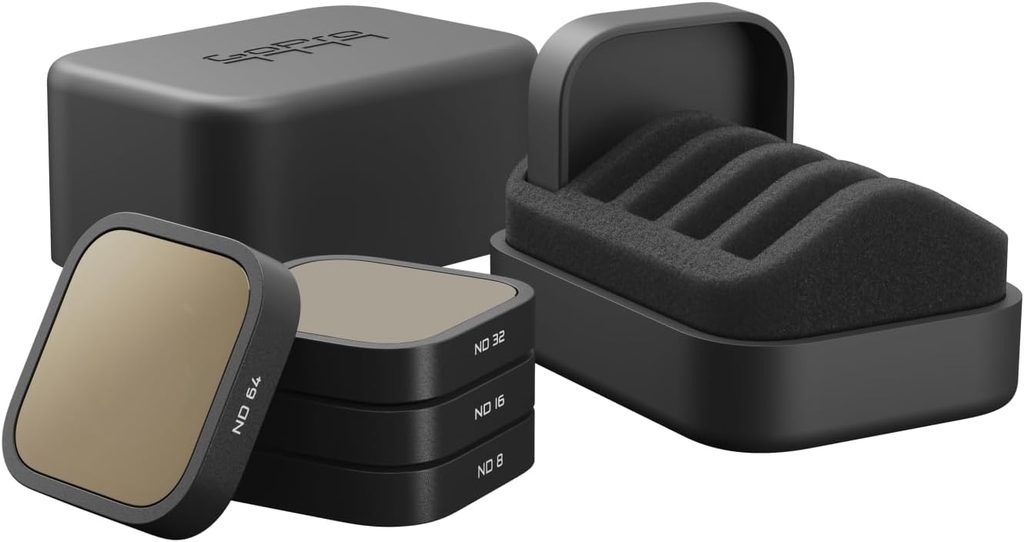
You want to get “cinematic” looking footage from that camera, so you went and bought yourself some ND filters. Only now, instead of getting that cinema-quality video, your footage looks soft, blurry, extremely shaky, and amateurish.
Why?
You’re doing everything right according to what you’ve read and heard…
You need ND filters for your camera.
You need to film at 24FPS, and your shutter speed should be double your frame rate!
ND filters are like sunglasses for your camera!
I assure you, the three statements above are completely false.
They’re also completely true.
Confused yet? Good, because that confusion is probably why you’re not getting the results you want. So today, we’re going to look at ND filters and finally try to make them make sense!
ND filters are NOT sunglasses for your camera
This is one of the most common misleading statements I hear when it comes to ND filters.
It’s actually a bad way of explaining ND filters because it puts people into the wrong mindset when it comes to understanding why you need ND filters and, most importantly, WHEN you need ND filters.
There’s an aviation term that gets used during the aftermath of a crash which basically says the pilot “was behind the airplane.”
This usually means there was already an out-of-control situation happening, and instead of correcting what was causing the issue, the pilot started making adjustments and changes to counteract it. This can lead to the original problem becoming even worse as the pilot frantically tries to keep up with what’s happening.
That’s called “being behind the airplane.”
In this case, thinking of ND filters as sunglasses for your camera is a little like “being behind the camera.”
What often happens is someone applies an ND filter to their camera and then starts adjusting camera settings to compensate for what they now see.
What they should be doing instead is thinking about the image they want to capture, adjusting their camera settings to achieve that look, and then applying an ND filter to match those settings and lighting conditions.
So what IS an ND filter used for?
Blur!
Or, to be more exact, to help create pleasing cinematic motion blur in your footage.
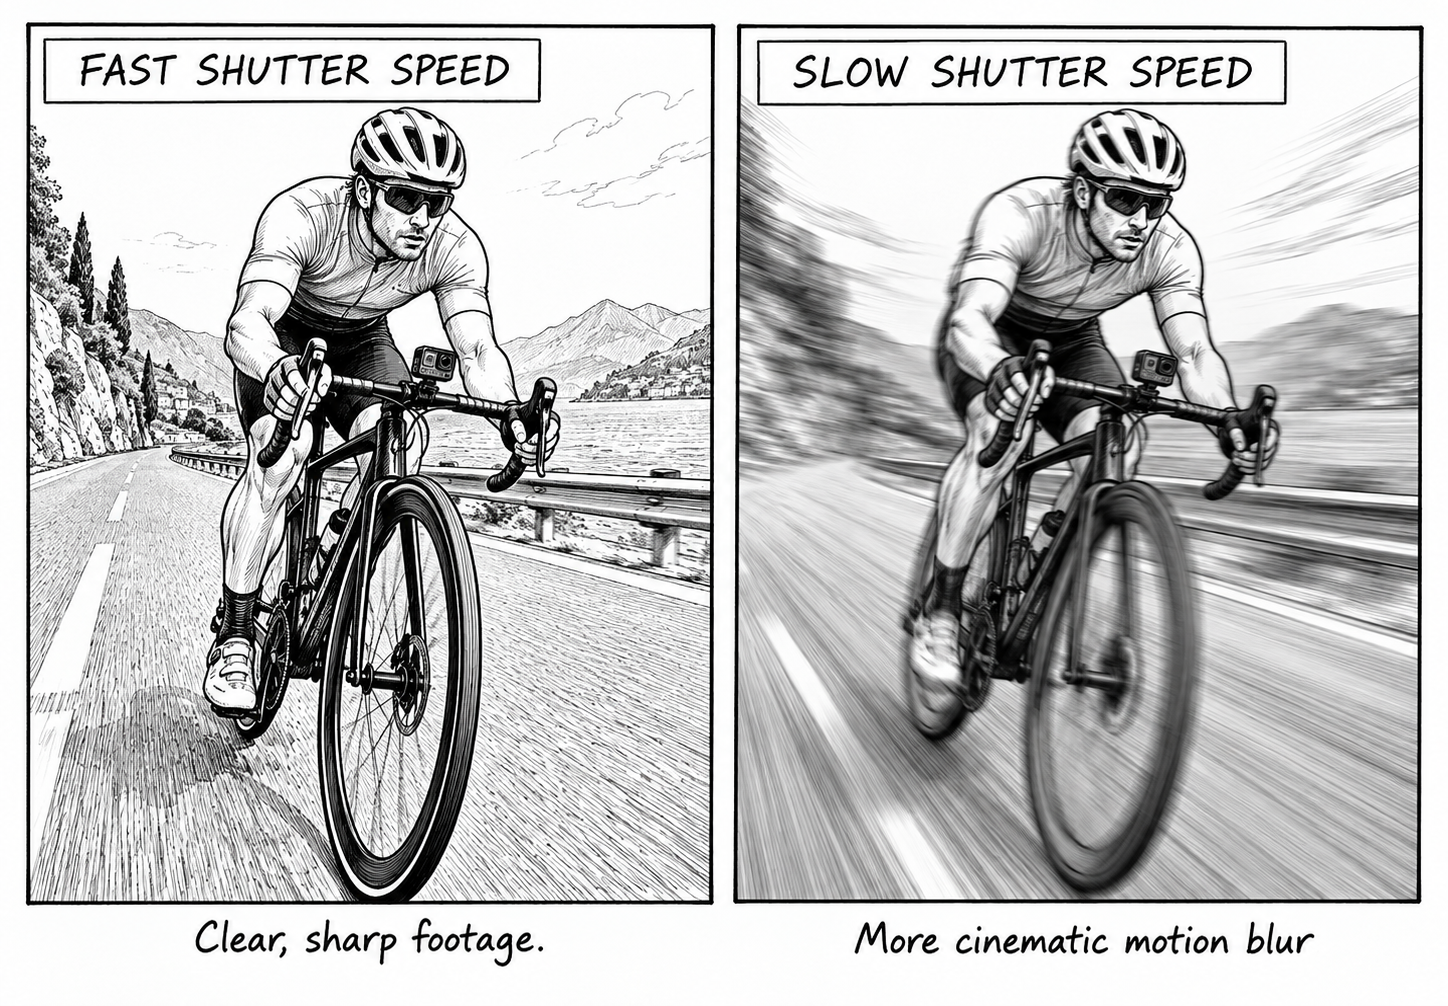
In bright, well-lit situations, your camera will often use a fast shutter speed. This makes everything look crisp and clear while ensuring the image is properly exposed. The brighter it gets, the faster that shutter speed may become.
This is to ensure the proper amount of light is hitting the sensor so the scene isn’t overexposed.
The problem is that this gives footage a very specific “action camera” look, where every single frame is crisp and clear.
Cinematic movies tend to avoid that look and instead have more pleasing, natural-looking motion, where each frame blurs slightly into the next.
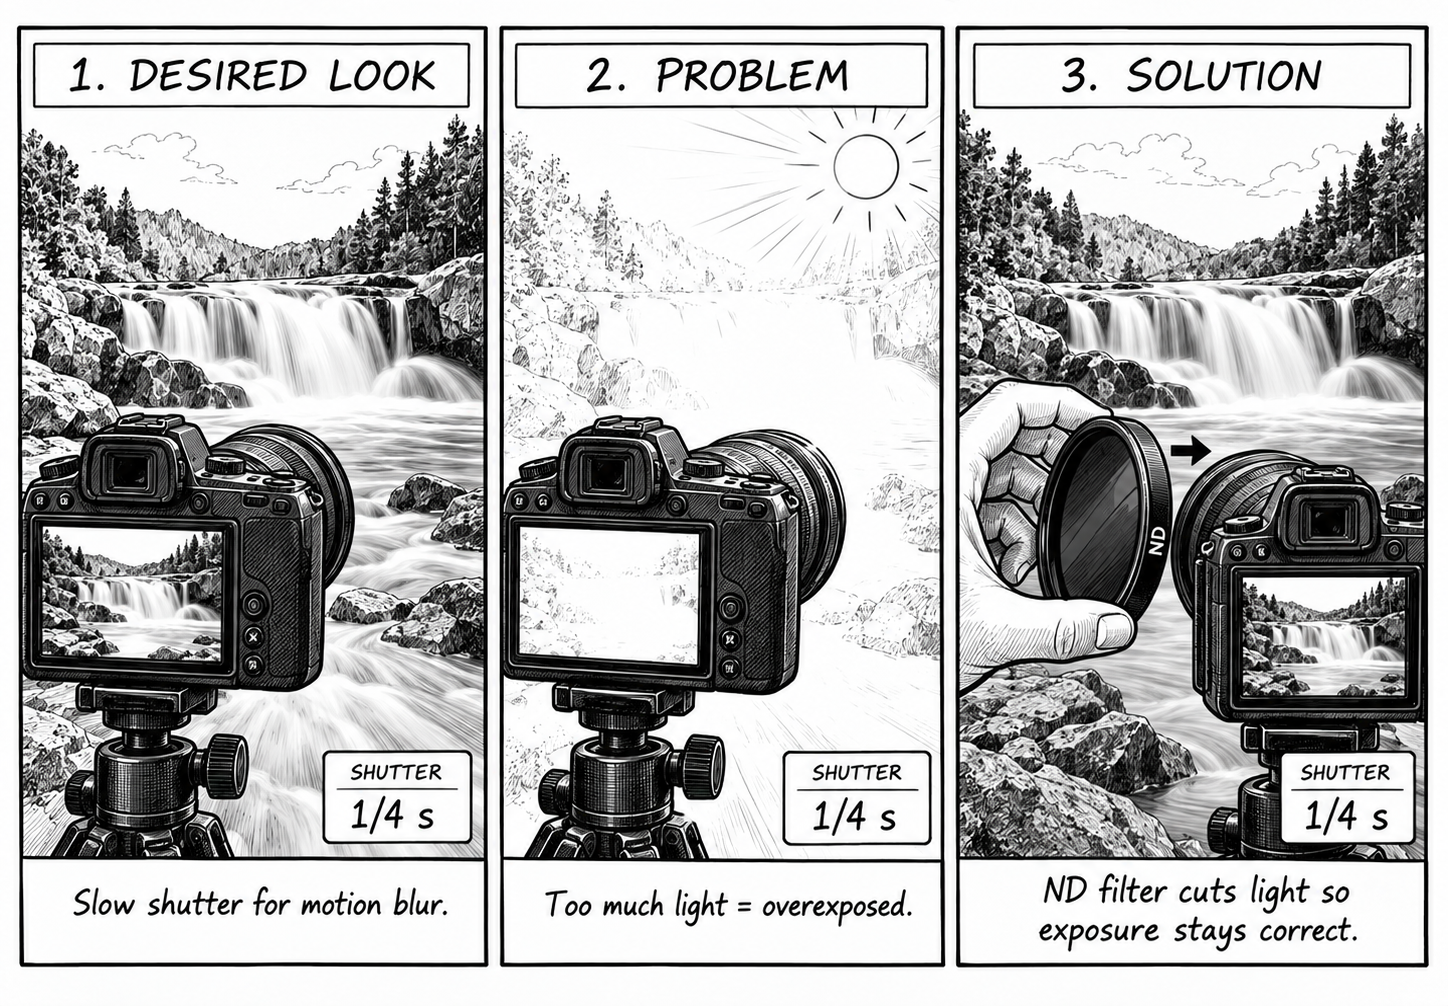
To achieve this look, you need to force your camera to use a slower shutter speed.
The slower the shutter speed, the more motion blur you’ll see in your footage.
That creates another problem, however: the slower your shutter speed, the longer you’re exposing the camera sensor to light. This can result in overexposure.
This is why we add an ND filter — to compensate for that slower shutter speed by reducing the amount of light reaching the sensor.
So why is my footage shaky and blurry?
Because you’ve deliberately set your camera up to create motion blur.
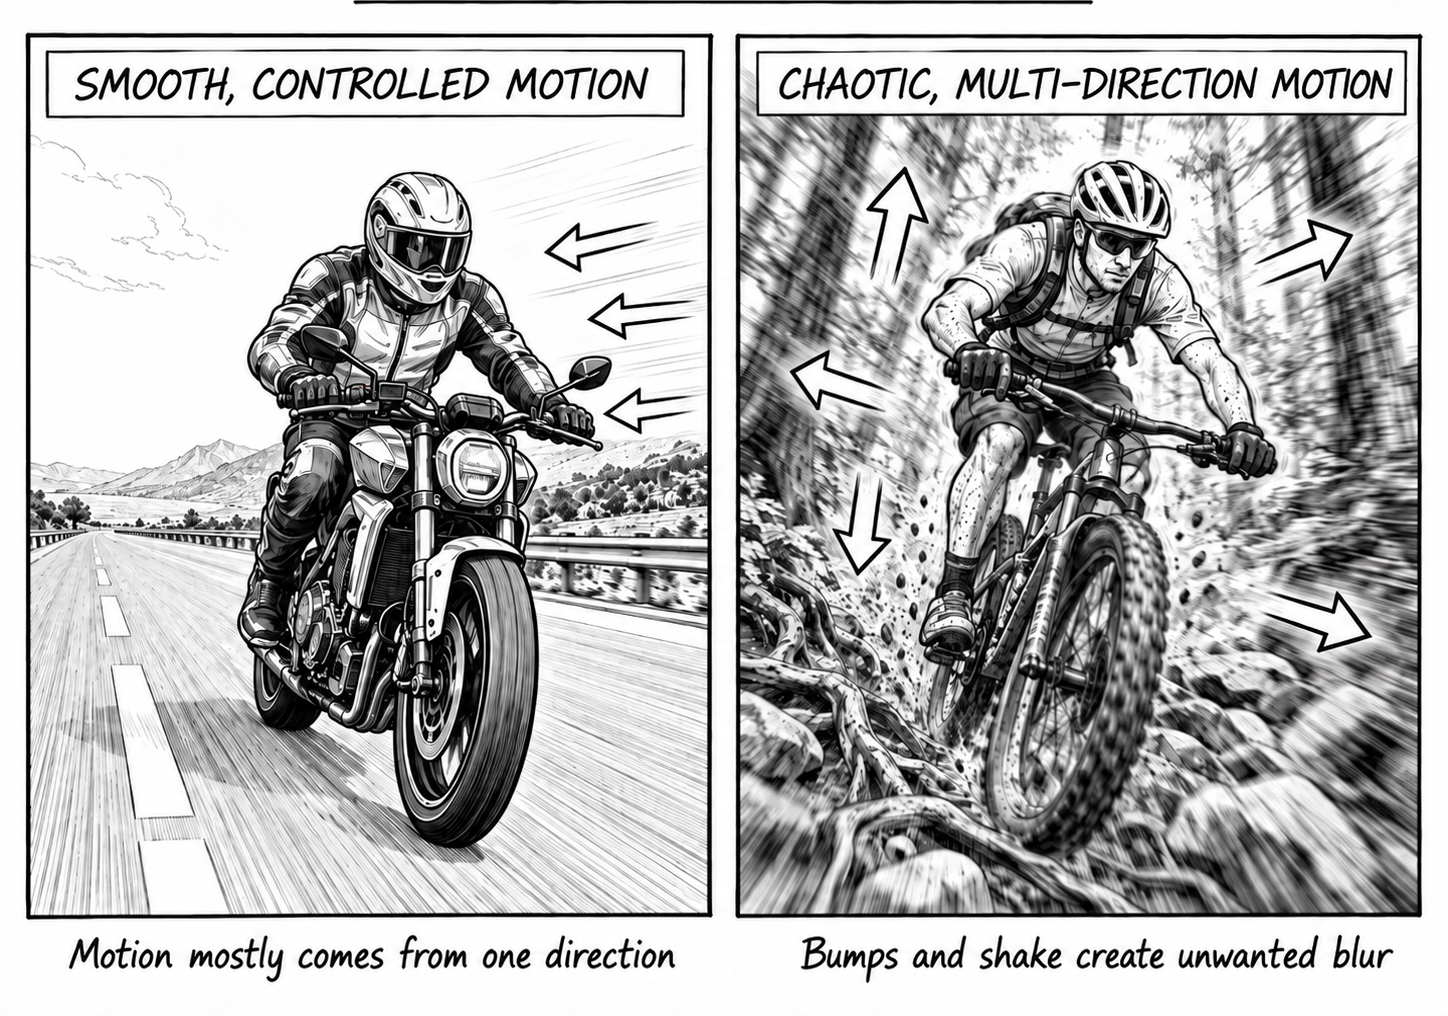
This works well when the movement is relatively smooth and predictable.
Think about driving a car or riding a motorcycle along a smooth highway, where most of the movement is travelling in one consistent direction. You can end up with a smooth, cinematic-looking journey with pleasing motion blur.
Now think about riding a bike on an off-road trail through a forest, or even hiking through that same forest.
You don’t just have movement in one direction.
Every bump you go over, every pothole you hit, every time you stumble… that’s movement.
Your camera moves up. It moves down. It shakes left and right.
Now you have motion coming from multiple directions, and that’s going to lead to unwanted blur in your footage.
There’s also the additional problem of changing light.
In darker areas of the forest, your camera may already be using a slower shutter speed to expose the scene properly. Slower shutter speeds create more motion blur.
However, if you’ve added an ND filter to the camera, you’ve now made the image even darker, which may force the shutter speed even slower.
This can result in underexposure, increased ISO noise, and excessive motion blur.
Even if you stop and reset your camera properly for those darker exposure levels, the minute you leave the dark area and step back into bright sunlight, you have the reverse problem.
Overexposure!
So how come these issues don’t happen in movies or TV shows I watch?
Simple.
Scenes are usually very carefully lit using out-of-frame lights where possible, helping darker areas maintain more consistent exposure levels with brighter areas. The image can then be further corrected in post-production.
Where that isn’t possible — for example, someone walking from inside a dark warehouse onto a bright city street — the production can simply stop filming, add a cut, and then set up the camera for the next shot so everything is properly exposed.
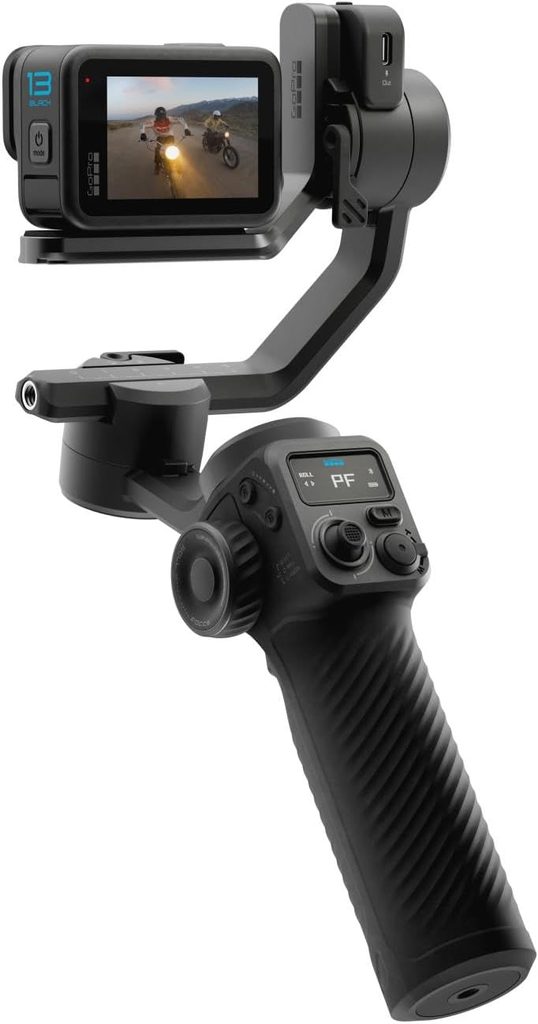
If they’re filming a night scene or a dark scene where movement could be coming from multiple directions at once — think of a car chase over a rough, pothole-filled city street — the camera itself can be physically stabilized on a gimbal or another stabilization system to reduce unwanted camera movement.
Sometimes camera movement is even reintroduced in post-production.
The original footage may be smooth as butter, but movement can be added later to create the illusion that the vehicle is bouncing across a rough surface.
So how do I get the proper amount of cinematic motion blur in my footage?
The basic rule of thumb is this:
Set your shutter speed to roughly double your frame rate.
So, since many movies are filmed at 24 frames per second, you could set your camera to 24FPS and your shutter speed to approximately 1/48 second.
Then, depending on your lighting conditions, you would add an ND filter to reduce the amount of light reaching the sensor and maintain proper exposure.
As previously mentioned, this works well for smooth filming where movement is relatively predictable.
But if you’re filming while walking around, riding a bike, or driving over uneven surfaces, you’ll want to eliminate as much unwanted camera movement as possible by physically stabilizing the camera.
That’s where a gimbal can help.
But my camera has built-in stabilization. Why doesn’t that work?
Because electronic stabilization and physical stabilization are doing two very different jobs.
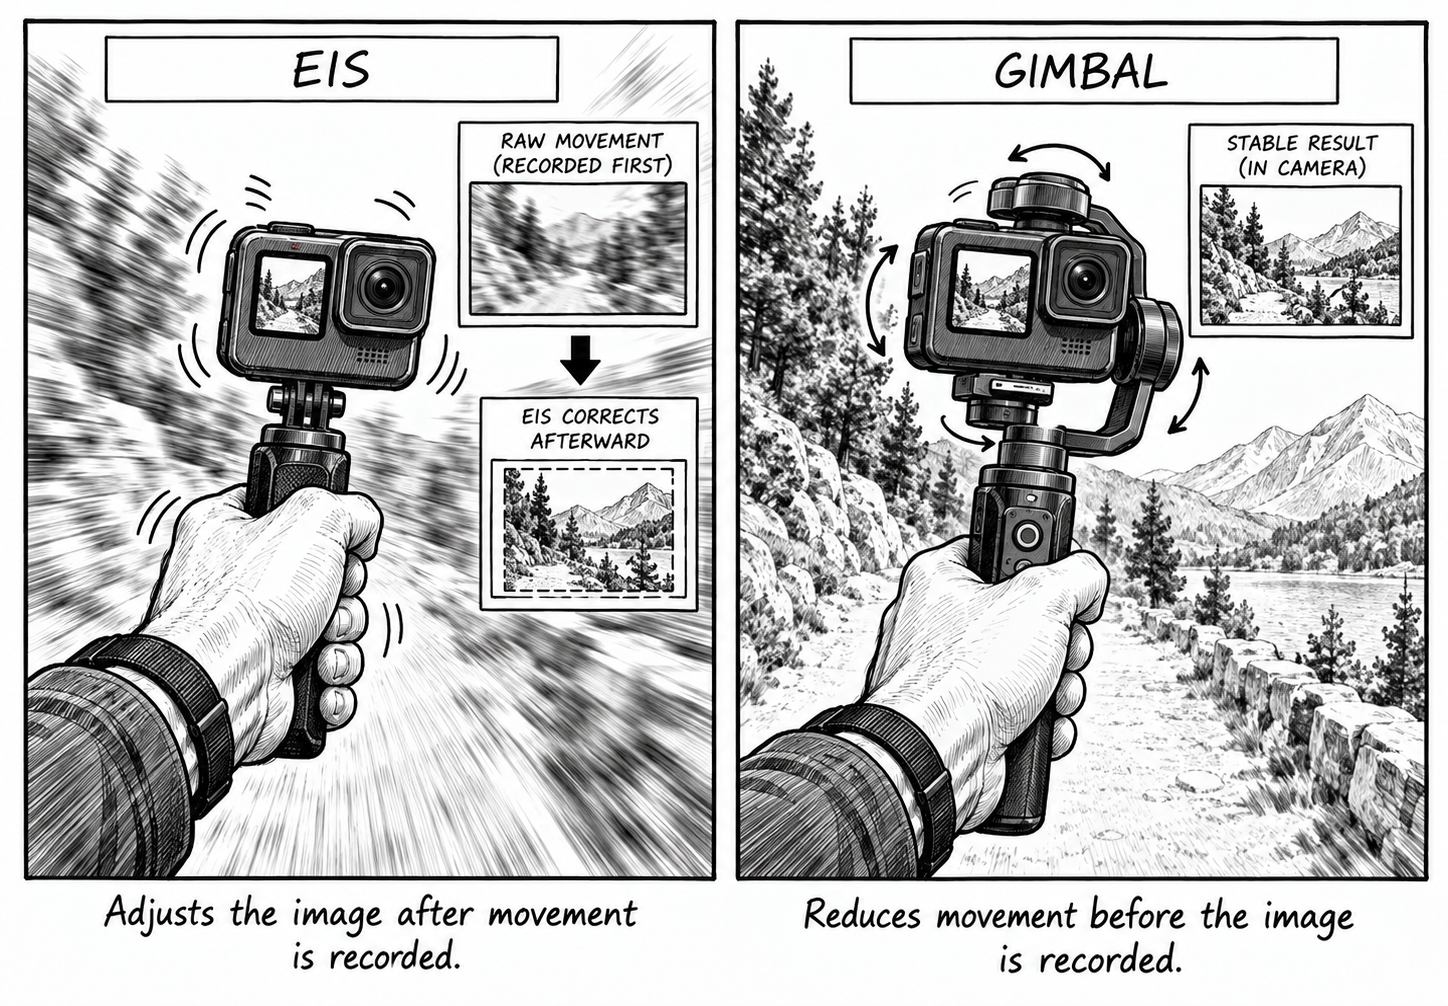
Electronic image stabilization, or EIS, doesn’t physically stop the camera from moving. Instead, it uses data from the camera’s gyroscope and accelerometer to work out how the camera is moving. It then crops into the image and shifts that crop around to help keep each frame aligned with the next.
In bright conditions, where the camera is using a fast shutter speed and each individual frame is nice and sharp, this can work extremely well.
The problems start when the light levels drop.
Action cameras use relatively small sensors, so in darker conditions they can quickly find themselves using slower shutter speeds or higher ISO values to maintain exposure. If you’ve also fitted an ND filter, you’re deliberately reducing the amount of light reaching the sensor, which can push the shutter speed even lower.
Once that happens, movement during each individual exposure can become recorded as motion blur.
And that’s the important bit:
EIS can move a blurry frame around, but it can’t magically make that frame sharp again.
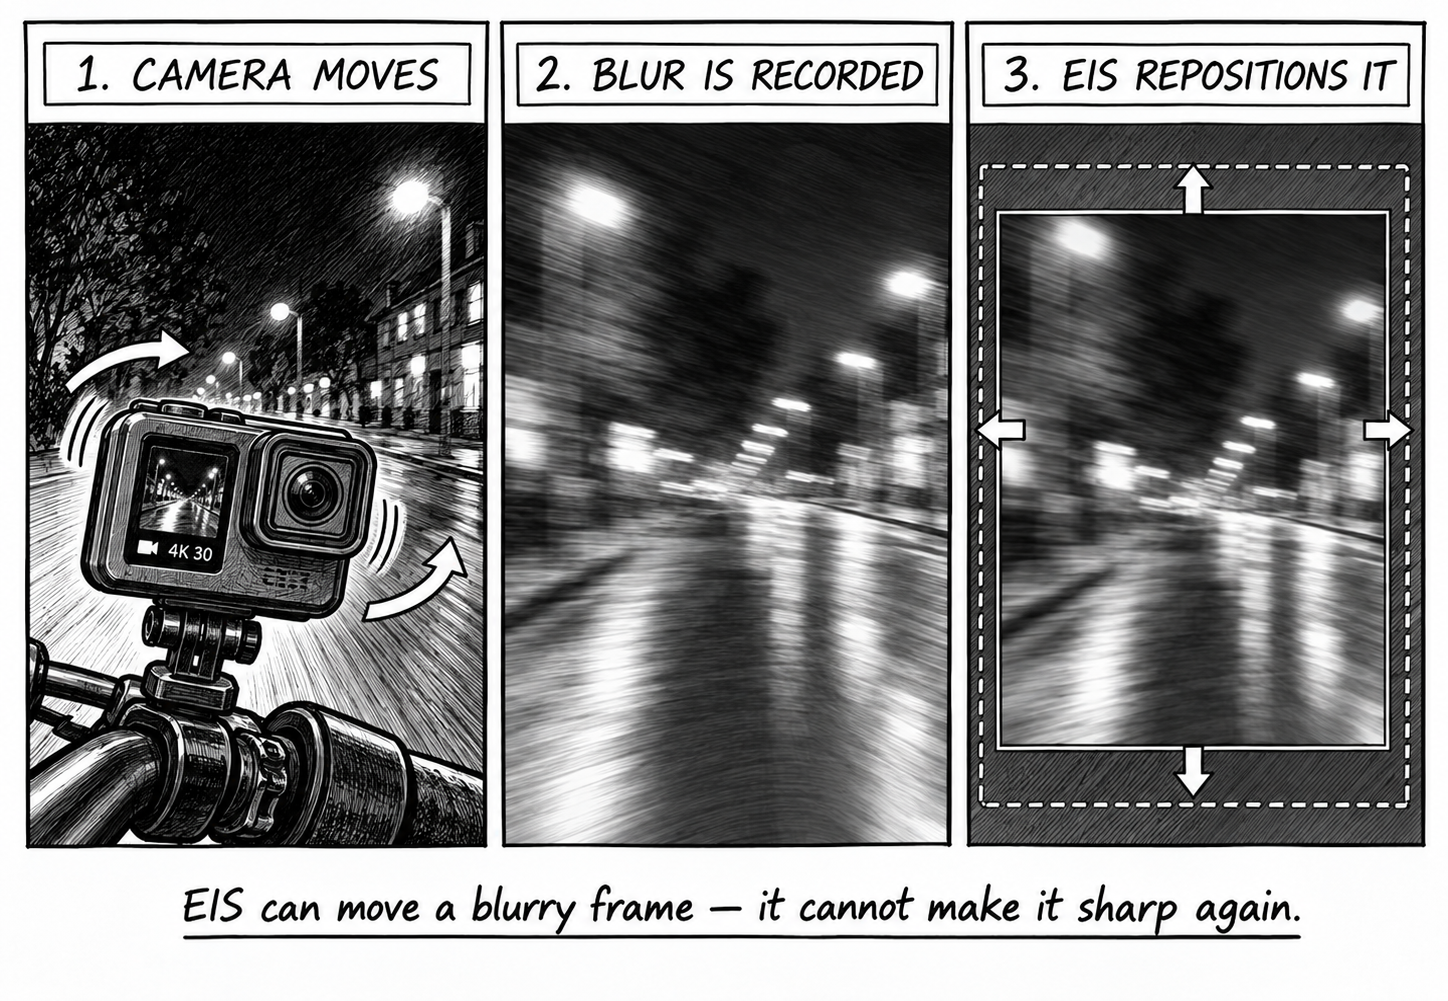
So even if the stabilization successfully lines one frame up with the next, the motion blur has already been baked into the footage. This can produce that strange soft, smeary, or jittery look you sometimes see from action cameras in low light.
Larger-sensor cameras can struggle with exactly the same problem too, although their better low-light performance may give them a little more breathing room before it becomes noticeable.
This is also why a physical gimbal can be a much better option when filming in darker conditions.
A gimbal physically reduces camera movement before the image is captured, which means less unwanted movement is recorded during the exposure in the first place.
However, there’s another wrinkle.
If you’re using a gimbal, leaving EIS enabled can sometimes cause the camera’s electronic stabilization to fight against the movement of the gimbal. The gimbal is already trying to physically smooth the camera’s movement, while the EIS may detect that movement and attempt to correct it electronically as well.
The result can sometimes be unwanted drifting, sudden corrections, or unnatural-looking movement.
So, as a general rule, if you’re filming at night or in darker conditions and you’re already using a properly balanced gimbal, turn EIS off and let the gimbal handle the stabilization physically.
That gives you the best chance of reducing unwanted motion blur before it gets recorded rather than trying to correct it afterwards.
So ND filters are not sunglasses for my camera?
Not really, no.
And honestly, it’s probably best to forget that analogy altogether.
People seem to be under the impression that simply adding an ND filter to their camera will magically make their footage look better.
As a result, people ask questions like:
“What type of ND filter should I use underwater?”
Even though it’s already darker underwater because of reduced light levels.
Or:
“What type of ND filter should I use when filming at night?”
None!
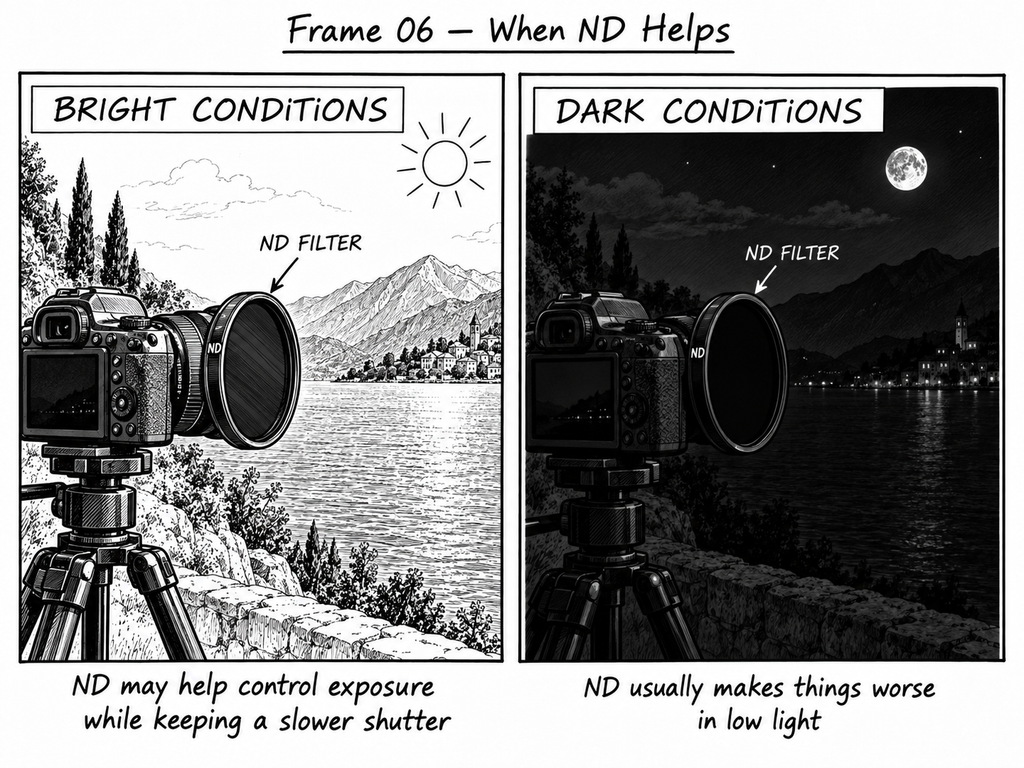
It’s already dark, and your camera may already be using a slower shutter speed to compensate.
Besides, other than ’80s singers, no one should be wearing dark sunglasses at night!
So when should I use ND filters?
The simple answer is this:
When you want to film with cinematic motion blur, you may need to use a slower shutter speed.
A slower shutter speed increases the amount of light reaching the sensor and can cause your footage to become overexposed.
An ND filter reduces that light so you can maintain your desired shutter speed while still achieving proper exposure.
That’s really the important part.
The ND filter isn’t creating the cinematic look by itself.
It’s allowing you to use the camera settings that create the look you want.
What about photography?
You can also use ND filters for photography for very similar reasons.
Think about photographing a running river or waterfall.
If you use an extremely fast shutter speed, you’ll capture every splash, water droplet, and piece of movement in sharp detail.
But what if you want that dreamy, smooth look where the water appears almost like flowing silk?
Then you’ll want to use a much slower shutter speed.
The problem?
That longer exposure can overexpose the image…
Unless you add an appropriate ND filter.
Slow shutter speeds are also great for architectural or street photography where you may not want people or moving objects to be clearly visible.
The slower the shutter speed, the longer the exposure.
The longer the exposure, the less visible moving people and objects can become because their movement is blurred across the exposure.
With a long enough exposure, a busy street can even appear virtually empty.
However, achieving exposures that long in daylight may require a fairly hefty ND filter to keep the image properly exposed.
Final thoughts
Don’t be in a rush to buy ND filters for your camera straight away.
ND filters won’t magically make your footage look “cinematic” if you don’t understand how to use them, why you’re using them, or when you actually need them.
Even the term “cinematic” encompasses far more than shutter speed.
There’s framing, lighting, composition, ambient sound, foley, color grading, aesthetics, camera movement, storytelling, and plenty more besides.
Learn how to use your camera.
Learn how to adjust its settings — and, more importantly, understand why you’re adjusting them.
Learn how to film.
And finally…
Practice, practice, practice!
Once you have that down, you’ll be ready to level up your game and start delving into truly cinematic-looking footage.
Obligatory boring link disclaimer
Some of the links in this article may be affiliate links, which means if you click one and buy something, DemonView may earn a small commission at no extra cost to you.
Think of it as a tiny bit of extra exposure for the site.
See what I did there?
No ND filter required.
It helps keep the lights on, the cameras rolling, and prevents this website from becoming horribly underexposed. As always, I only recommend products I think are actually useful. Nobody is paying me to pretend an ND128 is a great idea for filming in a cave at midnight.
If a product was supplied for review, sponsored, or otherwise involved in some corporate tomfoolery, I’ll make that clear too. Basically, the links may earn me a little money, but they won’t affect the exposure of my opinions.
 English