Ok, before I begin, you may think “Why should I set up a streaming weather camera?”. Well, there’s actually a couple of reasons for this and some of them are smarter than you may think (or you may think I could possibly come up with). So, let’s look at the reasons you may want to set up such a camera feed!
1: It will increase your watch hours on YouTube. This helps with getting monetized or if you are already monetized, with making actual money when people tune in and watch.

2: You’re obviously helping people know what the weather is like at your location (or the location you have the camera set up at). That’s just a very handy service to provide to people, even local news stations may be interested. This is why Florida weather cams are useful anytime there’s a hurricane!

3: Since it’s your camera, you can pretty much show any type of overlay you want on it. Whether it be an advertisement for your channel, charge other people to feature their advertisements or even just support a good cause! You can do all of that by setting up a live camera feed and letting people tune in.
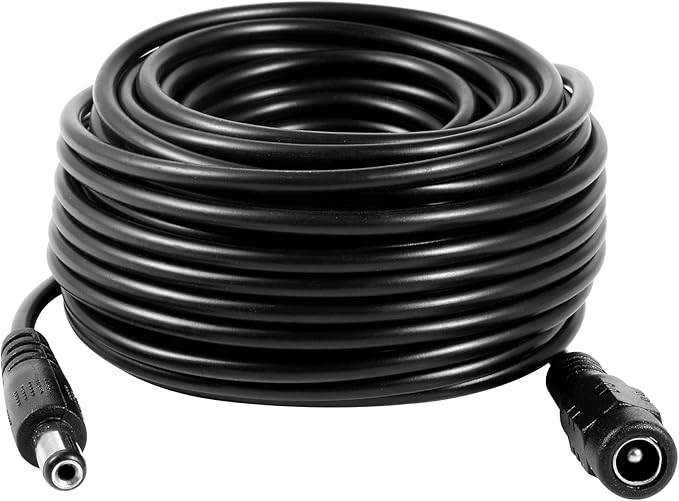
So with that in mind, how much does it cost you to have a live weather camera? Well…. if you have a laptop/pc and a YouTube account. Then the entire hardware investment could work out at around…. $60. Yup, you heard me (or read me), $60. It could be lower, but I splashed out for an extra-long power cable for the camera I’m going to use. So, let’s take a look at the 6 things we’ll need!
1: A laptop or PC (a modern one at that, it’s no use trying to set this whole thing up on Windows 3.1 or something).
2: A YouTube account (although there’s probably other streaming services you can use like twitch etc., I’m just going the easy way and using YouTube!).
3: The ability to Go Live on YouTube. Now before you had to have “X” amount of subscribers, I think now you only need 50 BUT… you need to let YouTube know you want to go live as it takes them 24 hours to authorize your account to do this. So if you’re reading this, log into your YouTube account, click on the “Go Live” button and follow the instructions onscreen. In 24 hours you’ll have the ability to “Go Live” whenever you want.
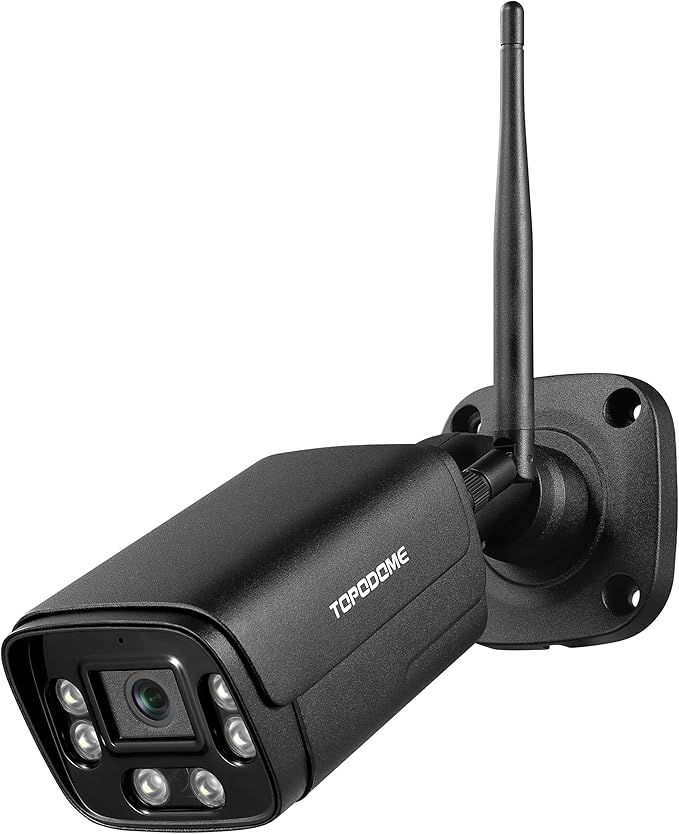
4: A camera! Now believe it or not, you could use your laptop webcam, an old webcam you have laying about the place…. but that’s not ideal. This would require a very long USB cable (which may not work if it’s too long) and your webcam or laptop may not be waterproof, so if you’re going to have rain or snow, that would prove to be a problem. So in this case, considering it’s a weather camera, we’re going to look at a wireless security camera that’s at least 1080P and supports RTSP (real time streaming protocol). The huge advantage of this type of camera is that it’s weatherproof, it’s 1080P, it’s also got built in night vision and since it supports RTSP, you can get a wireless signal from the camera directly into OBS studio!
5: A long power cable (optional) as this will help you with mounting options for your camera. The further away you are from a power source, the longer the cable you will need obviously.
6: OBS studio (there may be other ways to do this, but since this is a tutorial about setting up a weather cam feed with OBS studio….. well that’s kinda the reason I’m doing this whole article really….).
With that, let’s get started!
Ok first of all, let’s order the weatherproof, infra-red security camera we’ll be using for this project! In this case I’m using the TD-J10A from Topodome. There could be other camera’s you could use, but I’m trying to use the cheapest quality option that is known to work well. Also, even though there are solar power or even solar powered PTZ camera’s out there, not all of them support RTSP and that’s a pretty important part of this equation.
Now since that may take a day or two to get to your house, I’ll sit here and wait until it arrives. I’ll also avoid making small talk, it’s not really my thing…….
Like I said, you may also want to order an extra-long power cable to help with mounting your camera in places were power may not be nearby.
You can continue on once your camera arrives… Wait, what’s that? It’s already arrived? OK, well let’s unbox that camera and get things set up!
Ok, so plug in your camera into its power source (for the setup, the camera can be nearby, it doesn’t have to be in its final location, in fact it’s easier if you set up the camera before mounting it). I also recommend downloading the app for your smartphone as this will speed things up considerably.
What you’re going to need to do is find out the IP address of your camera, now with my Topodome camera, this required downloading and installing the “CamHipro” app to my phone. I was then able to follow the onscreen instructions and connect to my camera. In the camera options, I was able to locate the IP address of my camera! Note this ip address, you’ll need it later on.
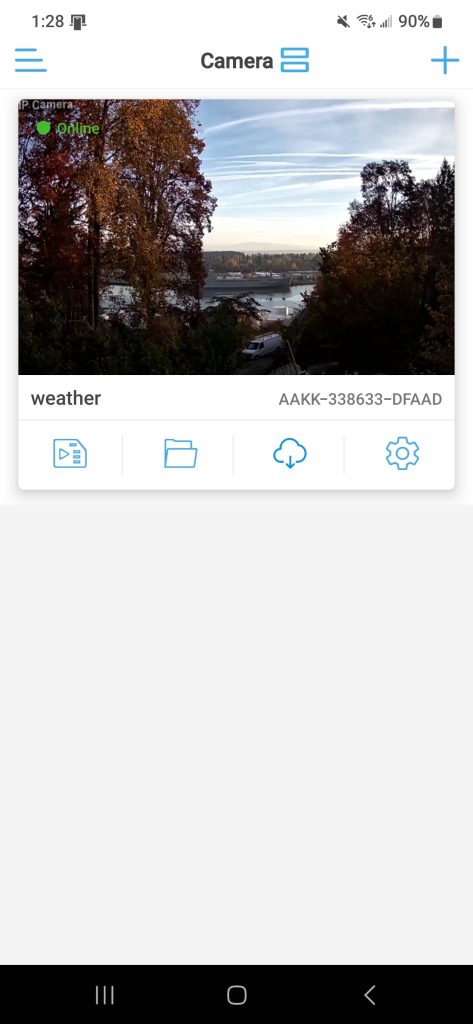
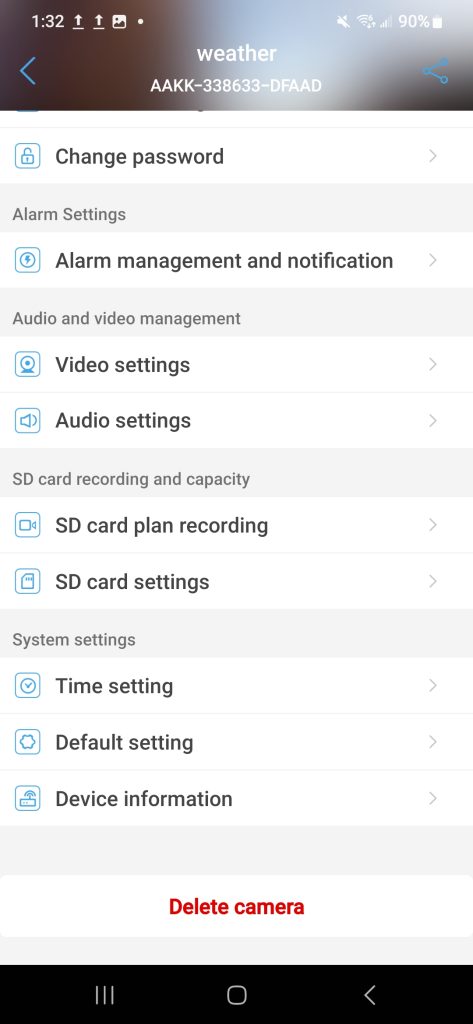
Now that you have your camera set up, we need this camera up to work with OBS Studio. So, if you haven’t already, please go and download OBS studio!
Please note, that all security camera’s are different and this may take a bit of “Figuring things out” but I’m going to give you the EXACT instructions that worked for me and my Topodome TD-J10A security camera.
Ok, now that you’ve downloaded OBS studio, I want you to install the software and run through the setup. Once the software is installed, open the software and we’re going to “add” a new scene on the lefthand side. You can call these scene “My Weather Feed” or whatever you want to call it.
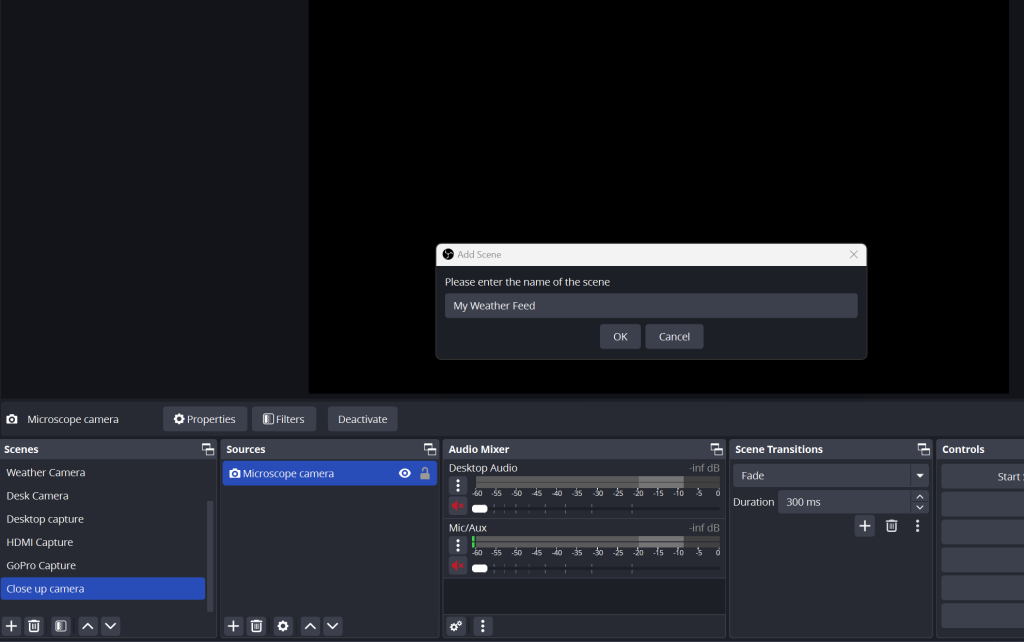
Once that scene is added, we need to add some sources to it. This is where it gets interesting. You can add both audio and video sources if you want to record both audio and video to your scene, however there are some pro’s and con’s to do doing this.
Pro: It’s always good to be able to hear the audio from the area the webcam is in. So if there’s thunder, lightning, howling winds….. your viewer will be able to hear it.
Con: If you’re lazing on your desk and your partner comes out to give out to you or scream at you OR you decide to talk about personal finances, logins, passwords….. all of that will be picked up by your camera also. So if you don’t want the whole world knowing what you’re talking about… maybe don’t include audio in your feed!
Ok, so let’s add the wireless camera!
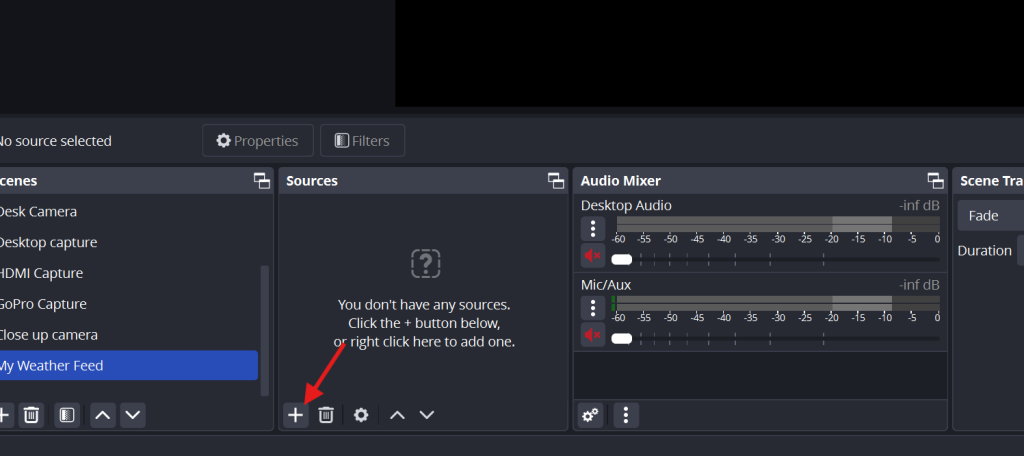
So click on the “Scene” you’ve just created on the left-hand side of the screen. Now in the middle of the screen, you should have an empty box saying “Sources”.
We’re going to click “Add media source” into our source option. So click on the “+” icon to add a source. Once you do that a box should pop open.
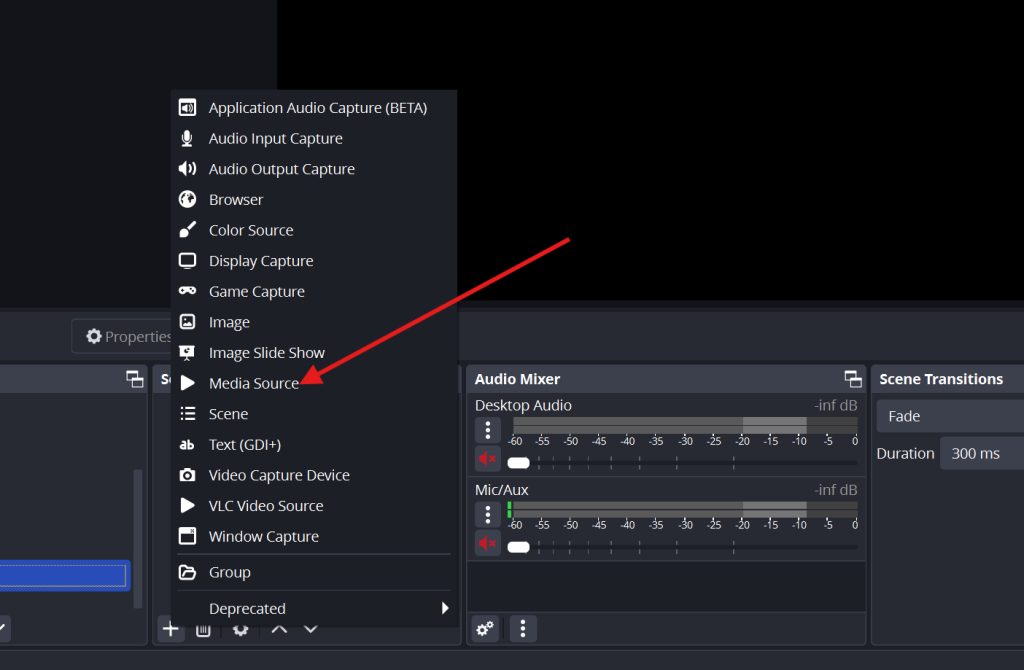
When the “Media source” option opens, you should see this.
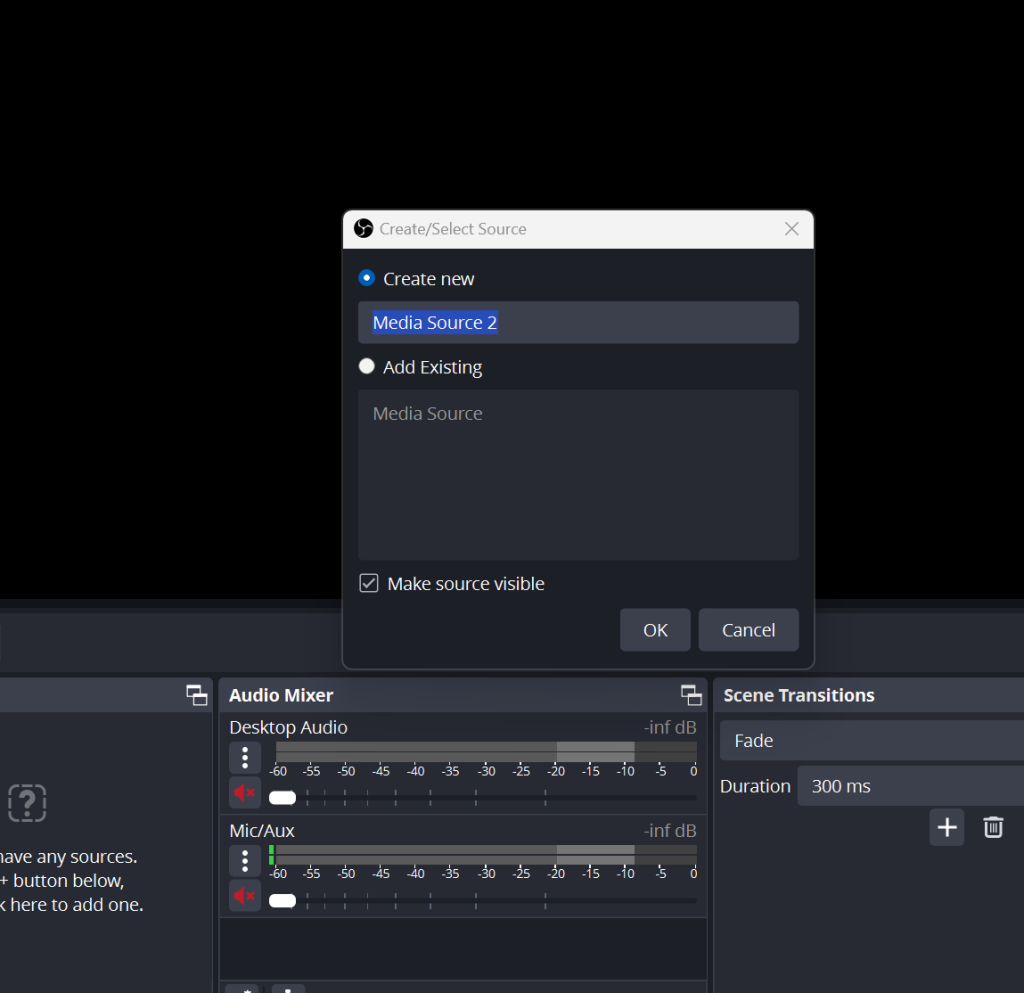
In this case you’re going to “Create” a new media source and give it a name. The only rule here is that you CANNOT call it the same name as your Scene. So if you called your Scene “Weather Camera” you cannot call your source “Weather Camera” also. You need to have a new name such as “Media Source” or “Topodome camera” for example.
Once you have click on OK, this is what you will see:
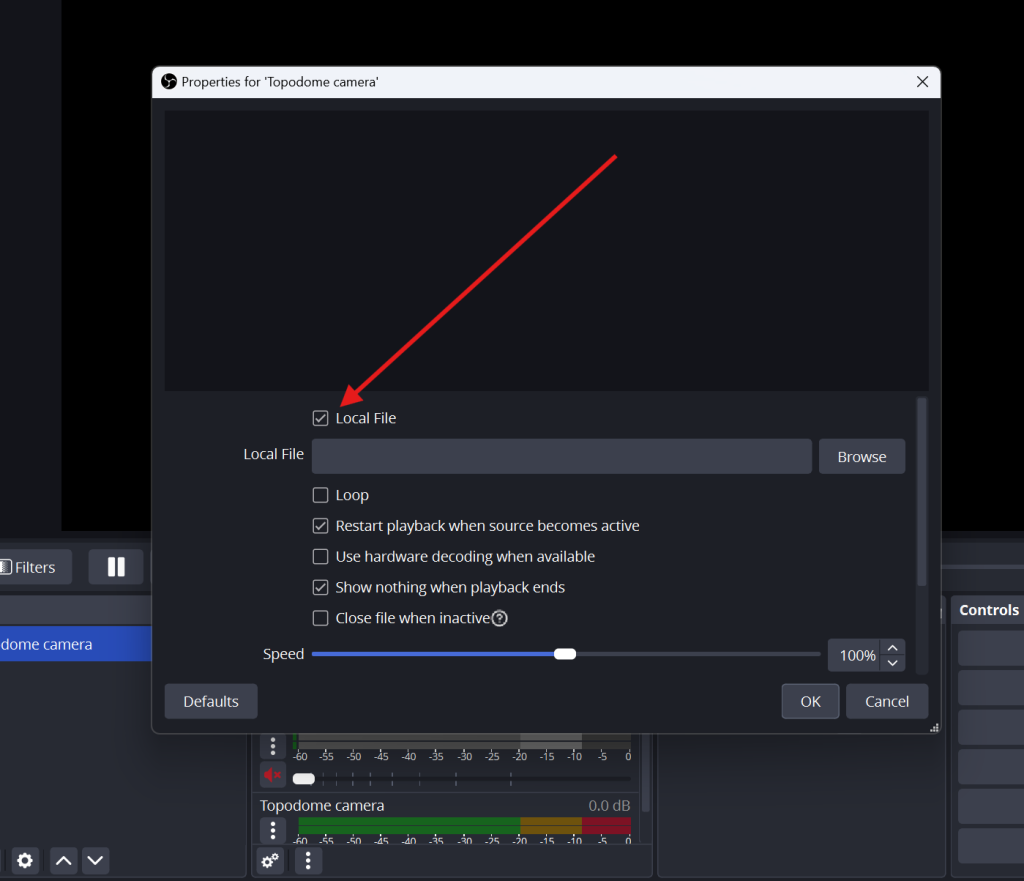
We are going to make sure the “local file” box is NOT checked (I believe it’s checked by default).
You will then see the following screen:
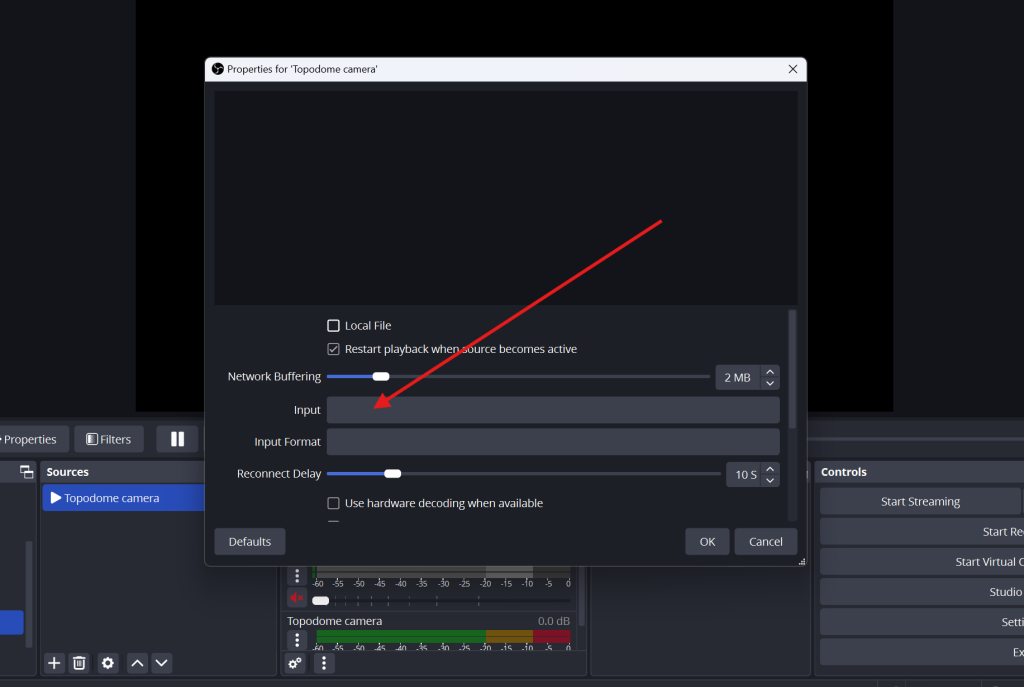
And then in our “Input” box, we’re going to type
RSTP://
After the // you’re going to type in your camera’s IP address (the one I asked you to write down earlier). So you should end up with a string that looks like this
RTSP://192.168.27.2
These numbers will differ based upon the IP address of your camera.
We will then add a /1 to the end. So it now looks like this
RTSP://192.168.27.2/1
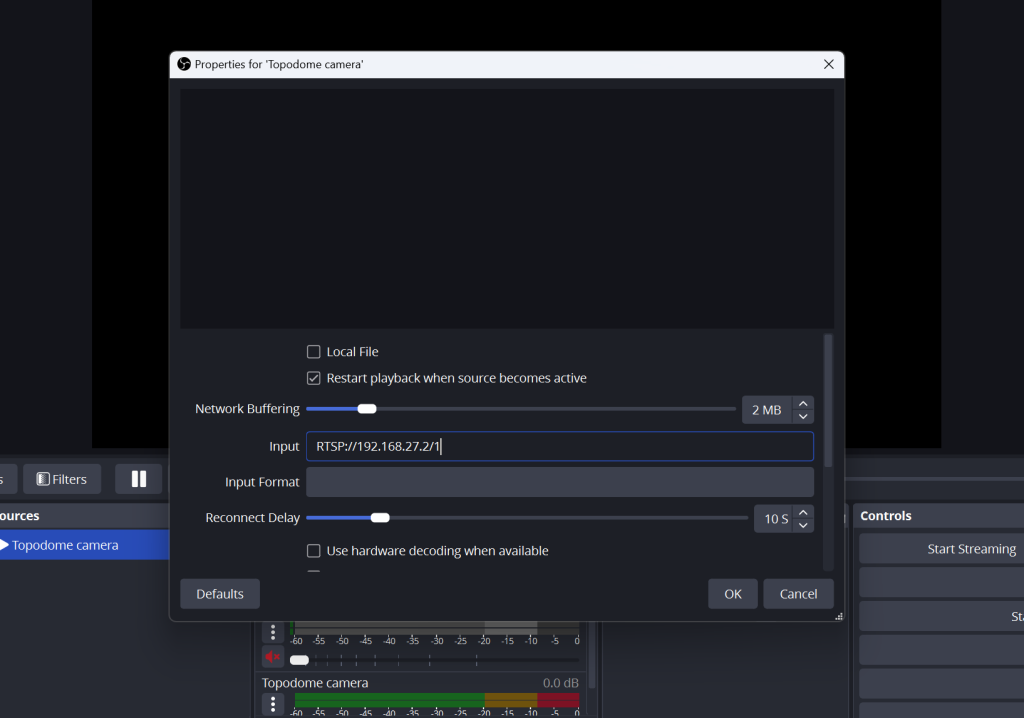
AND THATS IT!
Your camera feed should now stream live to OBS studio. Congratulations, you’ve successfully completed Step 1 in setting up a live weather camera feed.
Now like I said, these are the exact steps that worked for my Topodrome TD-J10A camera. If you’re using a different make or model of IP camera, these steps may or may not work. Your camera HAS to support RTSP for this to work and not all models do this.
So should you go live straight away?
Well honestly, no, not yet! If you do, it’s a bit of a wasted opportunity as all this will do is show a live camera feed. There are two more things we should consider doing and I’m going to address those in the next tutorial. This will be “Adding weather information” to your camera feed (including general location, temperature, time and weather!) as well as adding a custom logo to your feed (so people can identify where the feed is coming from). So, stay tuned for parts 2 and 3 coming soon!
